What’s on the iPod: Woodpile by Frightened Rabbit
A sad day here in our house — our goldfish died. Why such a fuss over a fish? Because he was 14 years old. Yes, they live that long and no, by that age they’re no longer “gold” but more whitish. He hadn’t been “perky” for a month. I suspect when we changed the water yesterday, it was simply too much for him. RIP, Ghillie MacBean.
They also grow into their environment. Fishy started in one of those tiny little bowls, but ended in a 30-gallon tank, which I drained this morning. That meant my work day started a bit later, and this blog post even later still.
Since I had the bulk of my projects in the first two weeks of this month, I decided to spend time getting to know my software a bit better. While I use quite a bit of the functionality built into Word, there’s always something new to learn. Let’s start with how to use styles.
Styles are a great way to add value to your freelance writer / client relationship. A freelancer who can deliver a document that looks ready to go to print is an asset.
I’m going a little from memory here since the project I used to do a lot of formatting for has gone in-house. Still, knowing how to format your text to make it fit can give you a huge advantage when the client wants a few different fonts, font sizes, margins and columns in the same document.
For this project, let’s assume a college course catalog.
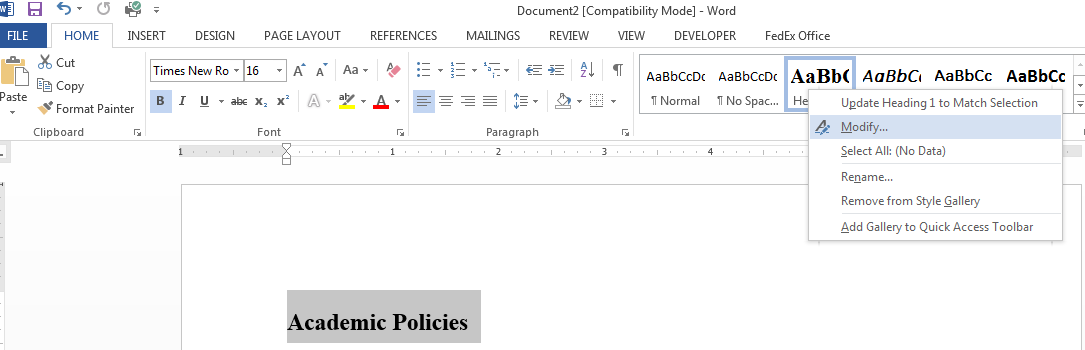
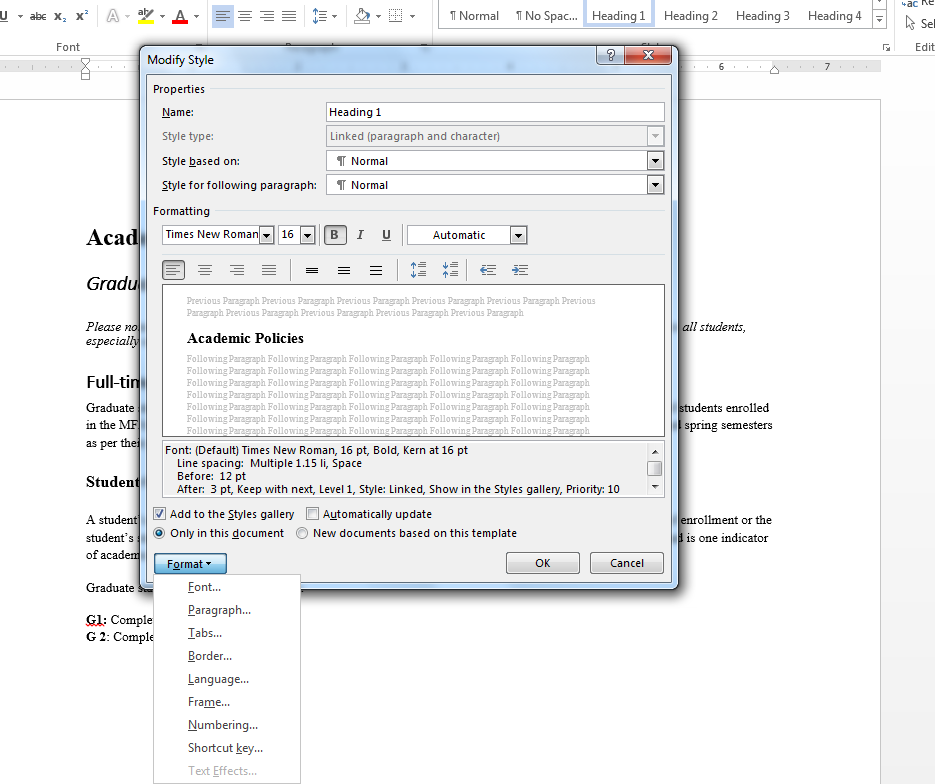
In order to create a table of contents (TOC), it’s best to get used to using Styles.When you assign styles in your document, you make creation of a TOC infinitely easier (think one click instead of hours of manual building). Styles are those little areas on your Word program’s Home tab (if you’re using 2010 and above). They’re right there under Styles (easy, right?). Here’s what you need to know before you set your styles:
- How many levels of head/subheads you’ll need
- How you’d like to differentiate each of those levels
- What font you’ll use for each/all
Academic Policies
Graduate Student Policies
note that unless indicated below, graduate students are bound by the policies
and practices that apply to all students, especially as noted elsewhere
in this catalog.
Full-time Status
full time if enrolled in at least nine credits per semester, with the exception
of students enrolled in the MFA Studio Art program who are considered full
time if enrolled in at least 4.5 credits during the fall and spring semesters
as per their program requirements. Tuition for part-time graduate students is
charged on a per-credit basis.
Student
Classification and Course Load
determined by the number of credits earned, regardless of the number of
semesters of enrollment or the student’s standing in his or her major program.
Class status is a factor in determining financial aid eligibility and is one
indicator of academic progress. Class standing is also used to prioritize
scheduling during registration.


I use 'em all the time, Lori. When I first discovered I could create a table of contents with headings I was all over it.
Sounds like a good series…
Doesn't it make it worlds easier to turn out a professional-looking document, Anne? I love it.
I'm going to go over spacing soon, too. The minute I learned how to change spacing to make things fall on the same page, my world changed for the better.
I use them, too. Love 'em. I have templates for my brand and some of my anchor clients.
I also have templates for my Statement of Work, proposals, white papers and case studies.
I hate to admit it, but I don't use them often. When I would write blog posts in Word, I'd use the heading styles simply because then they'd give me the right heading tags in WordPress when I copy/pasted. But other than that, I never used them for anything. And I despise trying to set up tables of contents in Word.
Now that I'm using Scrivener for more projects, it might not matter to me as much. But I'm looking forward to that post all the same. It would be good to know when using their mobile version on the tablet at least, assuming the same rules would apply. 🙂
I didn't even know Word had "Styles."
🙂